Integrate SuperSaaS into a WordPress site
We provide a free WordPress plugin that can automatically sign your users into SuperSaaS using their WordPress username. So users only need to sign in once to access both your website and the SuperSaaS schedule within it.
- Show your schedule inside your WordPress website
- Install and set up the plugin
- Change account settings in SuperSaaS
- Add booking button to your website
- Tips for troubleshooting
Show the schedule inside your site, or forward users to SuperSaaS
Depending on your preference, the SuperSaaS WordPress plugin displays either a button that forwards the user to your schedule on the SuperSaaS site, or it displays a booking “widget” integrated via JavaScript, so users remain on your site. If you choose the widget option you can further specify whether the schedule should appear inside a frame on your site, or hidden behind a button that shows the schedule when clicked.
The plugin optionally passes the WordPress user information along to SuperSaaS, creating the user in the SuperSaaS database or updating their information as needed. This saves users from having to create a separate login for the booking system and avoids the need to log in twice. If you’re not using the WordPress user registration system then the plugin does not add much value. Instead, you can follow the general instructions on how to integrate a schedule in your site.
Installation and setup of the plugin on WordPress
Steps to set up the WordPress plugin
- Install the plugin. Go to Dashboard>Plugins and choose “Add New” then search for SuperSaaS. Click “Install Now” and activate the plugin.
-
Set up the plugin. Select Settings>SuperSaaS from the menu to go to fill out the SuperSaaS Settings screen:
- SuperSaaS account name – This is the name of your account (not your email address).
- How would you like to show your SuperSaaS schedule? – Choose from a button that forwards user to your SuperSaaS calendar, or integrated into your website (either as a button or inside a frame)
- Log in WordPress users to SuperSaaS automatically? – When this option is checked and the user is logged into WordPress, log them into your SuperSaaS account with their WordPress username
- SuperSaaS API key – (Required for automatic log in.) You can find the API key of your SuperSaaS account at the bottom of the Account Info page.
- Widget code – (Required when ‘integrated’ option is selected.) Paste the JavaScript widget code generated on booking widget page.

- Schedule name – (Optional) You can either put the name of a schedule or you can provide a full URL. A URL can be useful if you want to add additional parameters to direct the user to a specific view. See below for information on multiple schedules.
- Button settings – (Only visible when forwarding to SuperSaaS.)
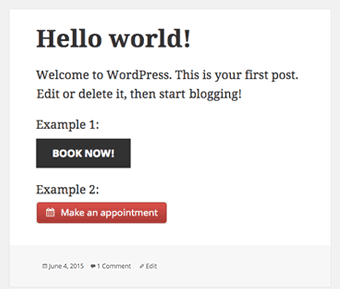
- Label defaults to “Book Now” or its equivalent in the supported languages.
- The URL of a button image, if present will be used instead of button text. (See example buttons)
- Custom domain name – (Only visible when forwarding to SuperSaaS.) If you use a custom domain name that points to your schedule, you can enter it here to correctly point your users to it.

Change SuperSaaS account settings to work with WordPress
Your WordPress user database is the primary source, meaning that any changes to user information on your WordPress site will be reflected in SuperSaaS, but not vice versa. Therefore, we recommend that you do not let your users change their user information in SuperSaaS because that could easily confuse them. For example, if a user were allowed to change their password on SuperSaaS they would probably not realize that their WordPress password is still the same.
Make the following changes to your SuperSaaS account to avoid inconsistencies:
- On the Access Control page, select
- On the Access Control page, select
- On the Layout Settings page, fill out the box Your URL with the URL of the page on your site where users can log in
Next, you need to ensure that the database fields in WordPress match those in your SuperSaaS user database. Make the following changes on the Access Control page:
- Deselect
- Switch the Email address radio button that appears to Optional (or Required)
- Switch the Full name radio button to Optional
- Switch all other fields to Don’t Ask (you can switch off the Password field too if you selected )
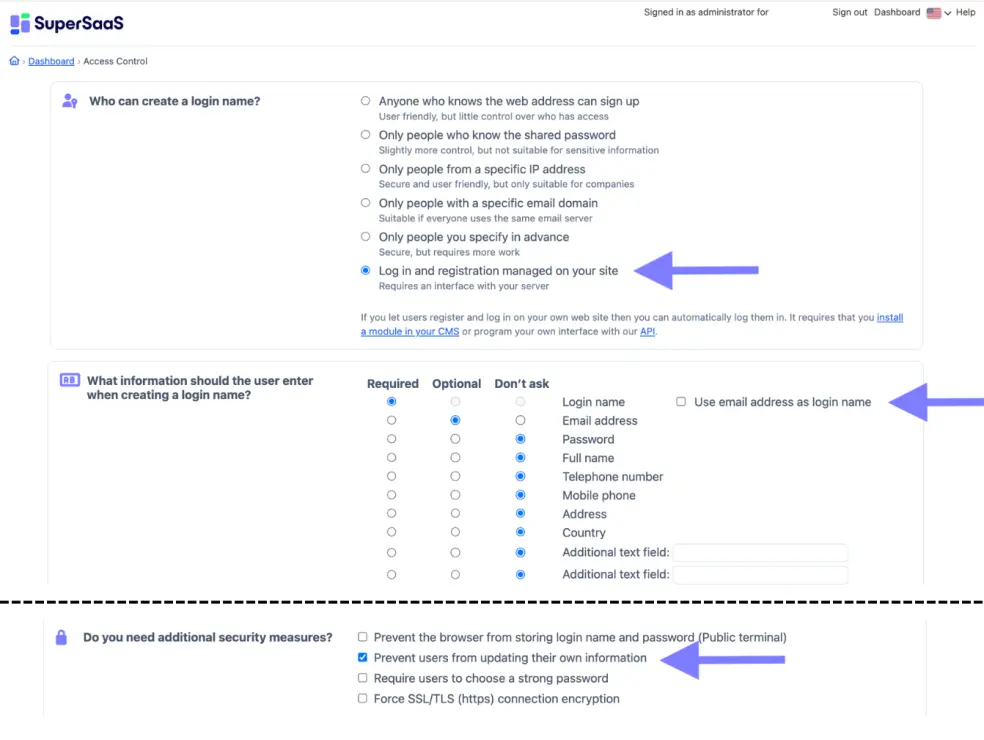
Configure SuperSaaS
This image depicts the Access Control page in your SuperSaaS account after changing the described settings.Add the button to your pages
Place the shortcode [supersaas] on your pages everywhere you want the button to appear.
The shortcode can take the optional parameters schedule, label, image, options, after (alias to schedule) to overwrite the values on the settings screen.
This is useful if you want to add multiple buttons to different schedules, for example:
[supersaas schedule="schedule1" label="Book on Schedule 1"][supersaas schedule="schedule2" label="Book on Schedule 2" image="https://example.com/book_now.gif"]
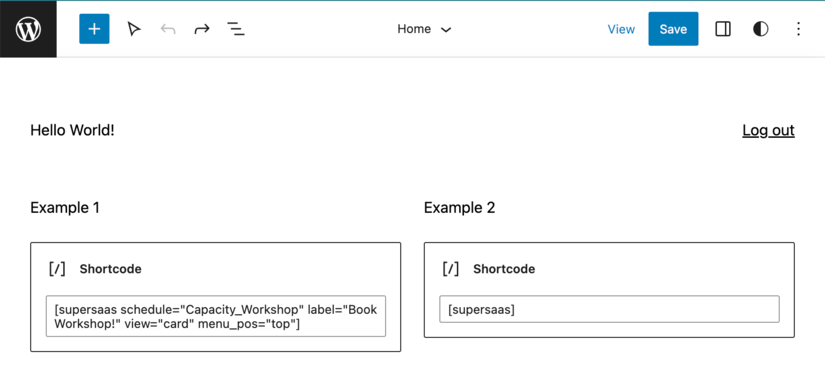
When using the integrated “widget”, shortcode parameters can be used to override widget parameters such as view, menu, menu_pos, etc.
An example for a button that opens a widget for schedule_name displayed as cards with menu at the top:
[supersaas schedule="schedule_name" label="Pick a time!" view="card" menu_pos="top"]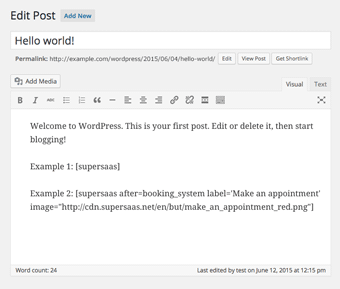
Try it out
You should now try out the integration on your site pretending to be a user to see if it works as expected. Note that the automatic login only works for regular SuperSaaS users, it does not log you in as the administrator. If you want to define superusers in SuperSaaS, make sure they have logged in at least once via your WordPress site before changing their role on the User Management page.
Troubleshooting tips
- If you see an error “Email is not a valid email address”, then please read the paragraph about the settings required on your SuperSaaS account again, to confirm you have made the correct changes
- If you don’t see the button then make sure you are either logged into WordPress, or you’ve disabled the automatic login setting
- If the button redirects the user but does not appear to actually log him in, and you have used a URL in the field Schedule name, then make sure that the domain of that URL is entered in the Custom Domain Name field