Link a SuperSaaS schedule to your Facebook page or Instagram account
Meta changes this integration regularly, and availability depends on your page type, account settings, and region. If you do not see the option described below, use a normal link to your schedule in your profile, bio, or website instead.
Facebook gives you the option to add a Book Now button on your Facebook business page or Instagram profile. It offers your customers a simple one-click way to your SuperSaaS schedule.
What do you need for the integration?
- A Facebook business page
- A SuperSaaS account with at least one schedule
- Optional: an Instagram account
Set up the “Book now” button on your Facebook page
- Visit the Facebook integration page
- For each schedule you want to connect press the Connect to Facebook button
- Facebook will guide you through the setup process in a multistep wizard.
- Please select or create an appropriate Business Manager account, ad account and pixel for your page.
- If you connect multiple schedules please be sure to use separate settings for each page.
- During this setup wizard you can also select or connect your Instagram account
-
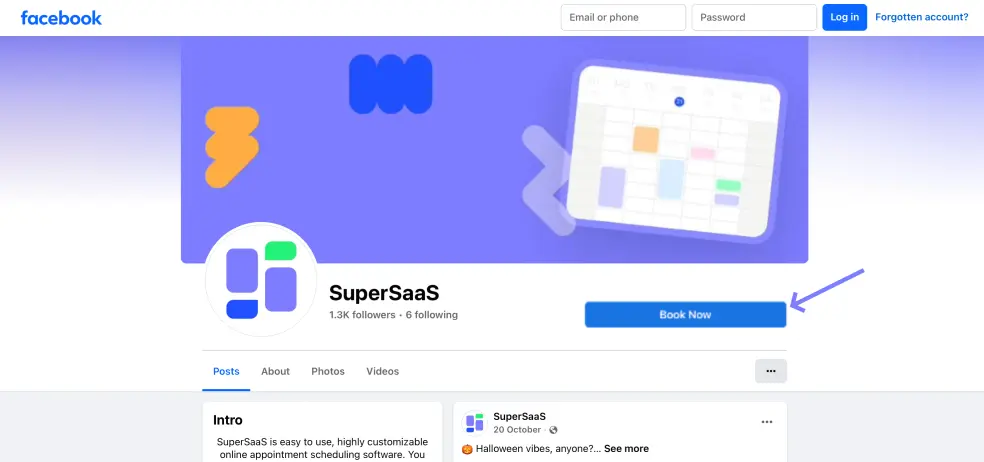
Your user will now see a ‘Book Now’ button at the top of your Facebook page which sends people directly to your online schedule. If you view your Facebook page yourself the button will instead say “Edit Book Now”, from where you can click “Test button” to try it.
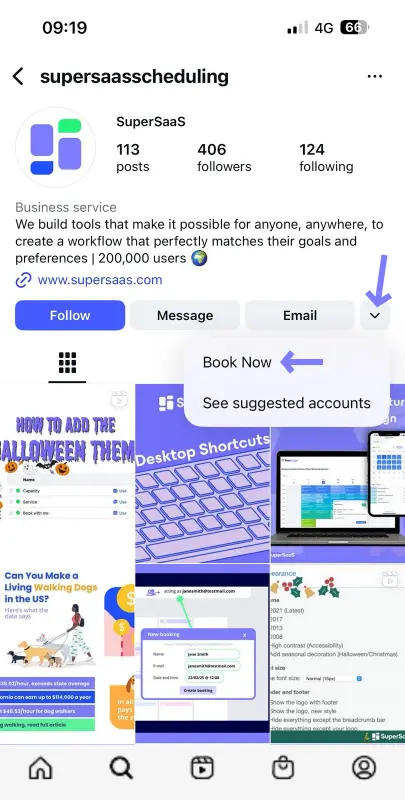
The examples below show what it will look like for people viewing your Facebook page on desktop and Instagram using the mobile app.
Facebook (desktop version)
Instagram (mobile app)
-
Facebook and Instagram also provide a way to do conversion tracking for your schedule. This can be helpful, for example when you do an Ad campaign with the “Book now” as the “call-to-action” for your ad. In order to do this you need to add a so-called “Tracking pixel” to your schedule. We do not insert the tracking pixel automatically because in most jurisdictions privacy regulations require that you ask consent from your users.
To add a consent popup message to your schedule do the following:- Go to Configure > Layout on the schedule where you want to enable this functionality
- Add the “magic word”
$ask_consentto the field “Message to show in the white space above the schedule”


Due to frequent Meta updates, the labels, screens, and images may differ from this tutorial.