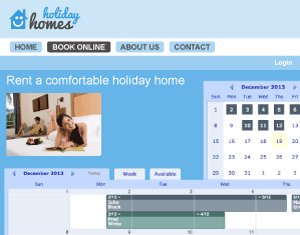
Direct users to your schedule
Once your schedule works as intended, you will need to decide how you would like to direct users to it. You can choose to send a link to your schedule via email, integrate the schedule into your website and/or add a “Book Now” button.
When you are logged in to your account, the integration tutorial will automatically generate the correct HTML code for your button or integration. Or, if you want to write the HTML yourself, you can locate the link to your schedule via Configure under the Overview tab. You also have the option to integrate the schedule into your Facebook page, or share the link via Instagram or Twitter.
For more information on integrating the schedule into your existing online platforms, have a look at our integration tutorial.
Go mobile
Your schedule is already optimized for mobile use, so you will not need to configure any settings. If you frequently access your SuperSaaS schedule from your mobile device, you may want to add an icon to your home screen for quick and easy access. There is no need to download an app, and you can find the steps at the end of this tutorial for putting your schedule on the home screen of your iPhone or Android.
Act on behalf of a user
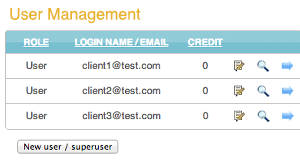
If one of your registered users contacts you by phone to make an appointment, you may want to add it to your schedule manually. Rather than add the booking as an administrator, you may want to act on behalf of the user to ensure that he or she receives a confirmation (if you’ve configured confirmation emails) and/or credit is being deducted from their user account (if you work with the credit system).
You can act on behalf of a user via User management located on the left-hand side of your Dashboard by clicking the on the blue icon with the arrow next to their name. To continue as administrator when the booking is complete, click on the user’s name in the top right corner of your screen.
You can also give users access to your schedules without requiring that they register/create a login name. In that case it can be helpful to uncheck the option “Use email address as login name” on the Access control page, so that a separate field for an email address becomes available. For more information on acting on behalf of a user, please refer to our customize the workflow tutorial.
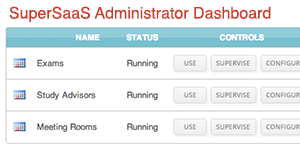
Use multiple schedules
Your free SuperSaaS account allows you to create as many schedules as you like, which is especially useful if you want to use the system for a variety of different applications such as meeting room reservations or event registrations. You can create a schedule by clicking on the New schedule page, located at the top of your Dashboard. In a few short clicks, you can either create a completely new schedule, or simply copy the settings of an existing schedule.
Grow your business
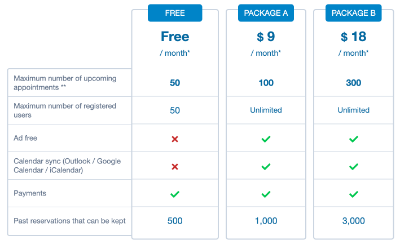
Once you’re completely satisfied with your system settings, and you have tested that it works as required, you can choose to upgrade to the paid version of SuperSaaS. All of your current settings and any appointments made in the free version will be preserved.
Upgrading to a paid account means that you will no longer see any advertisements, but best of all, you will no longer be restricted to a maximum of 50 upcoming appointments. If you are planning to use SuperSaaS for commercial purposes you may benefit from a few additional tips to help you grow your business and gain more bookings.
Our welcome emails offer a brief overview and introduction to SuperSaaS. You can discover the system’s wide range of features, as well as useful tips & tricks, on our tutorial page. Here, we cover a number of topics, such as allowing repeated reservations, creating custom drop-down menus, working with supervisor fields that are only visible to the administrator and superusers, in addition to explaining special options that can be activated via URL extensions.
This is our last email with tips on how to set up your SuperSaaS account. In the future, we will keep in touch with our annual newsletter. Connect with us through social media if you would like to stay up-to-date with the release of new features and improvements for your online appointment schedule.
On behalf of the SuperSaaS team, we hope you enjoy discovering all your system has to offer.
Kind regards,
SuperSaaS Customer Care Team
![]()
![]()
![]()
Excited about SuperSaaS?
Join us on our social media platforms to keep up with all the latest news and developments.